Martha Washington candy ranks among America’s favorite homemade confections. A rich chocolate coating surrounds its creamy, nutty center that melts in your mouth. Many home bakers feel intimidated by this classic treat, but making your own Martha Washington candy recipe comes easier than you might expect.
America’s first First Lady inspired this traditional Southern delicacy. Your homemade version can taste better than store-bought varieties. These sweet treats make perfect holiday gifts and special occasion delights, and becoming skilled at the Martha Washington candy technique needs just careful attention and proper guidance.
This detailed guide teaches you to create perfect Martha Washington candy. You will learn everything from choosing quality ingredients to getting that flawless chocolate coating. The process breaks down into simple, manageable steps that help you avoid common pitfalls challenging beginners.
Essential Tools and Ingredients for Success
Getting your kitchen properly equipped will make a huge difference in your Martha Washington candy-making results. The right tools and quality ingredients separate good candy from exceptional treats.
Must-have kitchen equipment for candy making
Your candy-making experience begins with the right equipment. A digital thermometer plays a vital role to achieve perfect chocolate temperatures. You’ll need a heavy-bottomed saucepan of at least 3 quarts to distribute heat evenly and prevent scorching.
Here’s what you need for your Martha Washington candy recipe:
- High-heat silicone spatulas to stir hot mixtures
- Digital scale to measure precisely
- Glass bowls to melt chocolate
- Baking sheets lined with parchment paper or silicone mats
- Candy dipping tools to create professional-looking results
Understanding ingredient quality and substitutions
Your choice of ingredients will affect the final taste of your Martha Washington candy. The best results come from unsalted butter at the right softness. Pick sweetened shredded coconut instead of unsweetened varieties to get the ideal texture and sweetness.
High-quality chocolate chips or candy coating work best for the outer layer. Semi-sweet chocolate gives you the perfect balance of sweetness. People on sugar-free diets can use alternative sweeteners like stevia or erythritol.
Setting up your workspace properly
A well-organized space leads to successful candy making. Clear your counters and make sure all tools are clean and within reach. Keep your area clutter-free because molten sugar mixtures can reach 325°F and need your complete focus.
Set up your workspace this way:
- Put your thermometer where you can grab it quickly
- Create a dedicated cooling area for your candies
- Keep measuring tools next to your mixing station
- Line up ingredients in order of use
Note that you should fine-tune your thermometer before starting – water boils at 212°F (100°C) at sea level. This quick check helps you make candy with precision. A double boiler station helps you control the chocolate melting process better when tempering.
Step-by-Step Mixing and Preparation
Let’s tuck into the heart of creating your Martha Washington candy – the mixing and preparation process. This significant stage forms the foundations of perfectly textured candies that will delight your family and friends.
Achieving the perfect butter-sugar consistency
Your stand mixer bowl needs softened butter and confectioners’ sugar with the paddle attachment. Beat these ingredients until they’re fully combined. The mixture should be smooth without any sugar lumps. The butter must be properly softened – not melted or too cold – to achieve the ideal consistency.
Proper incorporation of wet and dry ingredients
The best results come from this sequence:
- Add sweetened condensed milk to your butter-sugar mixture
- Mix in vanilla extract
- Incorporate coconut and chopped pecans
- Fold in any additional ingredients like maraschino cherries (if using)
Important: The final texture can change if you overmix after adding dry ingredients. Just combine everything until incorporated.
Visual cues for ideal dough texture
Your Martha Washington candy mixture transitions through several stages before reaching the perfect consistency. These key visual indicators help you know what to look for:
- The mixture should be firm enough to handle but not sticky
- The shape should hold when pressed without being crumbly
- A creamy and uniform texture should run throughout
The dough needs proper chilling time. Refrigerate for at least 2-3 hours, though overnight chilling often produces better results. This resting period helps develop the right consistency and makes the mixture easier to handle.
Powdered sugar can be added gradually if your dough seems too soft until it reaches the right consistency. But it’s worth mentioning that additional sugar will increase sweetness. The creamiest results come from avoiding too much powdered sugar – you want a rich, smooth texture that’s firm enough to roll while maintaining its luxurious mouthfeel.
The mixture becomes noticeably firmer during chilling. You’ll find it easy to roll into balls without sticking to your hands when properly chilled. Let it sit at room temperature for a few minutes if the mixture becomes too firm.
Temperature control plays a vital role throughout this process. A too-warm kitchen makes the mixture hard to handle, while too-cold conditions might make it unnecessarily firm. Room temperature around 70-72°F gives optimal results.
Mastering the Rolling and Shaping Process
Your Martha Washington candy takes its classic form during the rolling and shaping process. The right techniques will help you create uniform candies that taste and look amazing.
Tips for uniform ball sizes
A small cookie scoop will be your best friend to get consistent candy sizes. Use a 1-tablespoon scoop to make uniform balls about 1-inch in size. This approach will give each piece similar dimensions that lead to even chocolate coating and better taste experience.
Perfect shaping requires these steps:
- Scoop the mixture using your measured tool
- Roll gently between your palms to form tight balls
- Place on a wax paper-lined baking sheet
- Work in small batches to control temperature
Preventing mixture from sticking
The candy mixture sticking to your hands can be really annoying. Here’s a pro tip: dust your hands lightly with powdered sugar before rolling to avoid sticking. The mixture becoming too soft while working signals it’s time to put it back in the refrigerator for a quick chill.
Proper chilling techniques
Perfect Martha Washington candy needs proper chilling. The original mixture needs at least 2-3 hours of refrigeration before shaping. The balls need more chilling time after rolling:
- 30 minutes minimum in the refrigerator before chocolate coating
- You can chill them up to 24 hours in the freezer for better results
Keep most of your shaped balls in the refrigerator while coating others. Only remove 8-10 balls at a time to dip. This method will help your candies keep their shape during coating.
The mixture getting too soft during rolling means you should take a break and refrigerate. Your chocolate coating will set faster with colder filling. Note that taking time with chilling will give you professional-looking results.
The rolled balls should be firm but not frozen solid when you start coating. Too cold and the chocolate might crack; too warm and they’ll lose shape. The ideal temperature is when they’re firm enough to hold their shape but yield slightly to gentle pressure.
Perfect Chocolate Coating Techniques
Your Martha Washington candy’s success depends on becoming skilled at the chocolate coating process. This final step reshapes the scene by turning simple candy centers into professional-looking confections that honor their namesake.
Choosing and tempering chocolate
Quality semi-sweet chocolate chips or candy coating create the perfect coating. Regular chocolate chips won’t work well because they contain stabilizers that affect melting. The chocolate needs proper tempering to achieve that professional shine and snap.
To temper dark chocolate:
- Heat to 120°F to melt
- Cool to 82°F while stirring
- Reheat carefully to 88-91°F to reach working temperature
A double boiler or microwave-safe bowl works best. Heat in 20-second intervals and stir between each session. Let the melted chocolate rest for 2-2½ minutes before you start dipping.
Dipping methods for smooth coverage
The chilled candy centers are ready for their chocolate bath. A fork or professional dipping tools help submerge each ball in the tempered chocolate. Smooth coverage comes from proper technique:
- Dip each chilled center completely
- Tap the fork gently to remove excess chocolate
- Scrape the bottom of the fork against the bowl’s rim
- Place carefully on parchment-lined baking sheets
Small batches yield consistent results while keeping remaining balls chilled. Only remove 8-10 centers at a time to maintain proper temperature control.
Troubleshooting chocolate coating issues
Coating challenges happen to even seasoned candy makers. Here are common problems and solutions:
Room temperature should stay between 65-68°F for proper chocolate setting. White streaks typically show up because of temperature changes or poor tempering.
Watch for these specific issues:
- Chocolate seizing (becoming hard and grainy): Water contact or overheating causes this
- Uneven coating: Chocolate that’s too thick or thin creates this problem
- Soft spots: These appear when centers are too warm during dipping
Dark chocolate needs a working temperature between 88-91°F for the smoothest results. Thick chocolate needs gentle reheating to reach proper working temperature without exceeding these ranges.
Note that humidity substantially affects your results. The workspace’s humidity should stay below 50%. Tiny speckles on finished candies often point to high humidity as the cause.
Storage and Make-Ahead Tips
Your Martha Washington candy will taste delightful long after preparation with proper storage. The right storage techniques will give a perfect treat whether you make them ahead for special occasions or save leftovers.
Proper storage conditions
The right environment keeps your freshly made Martha Washington candy perfect. The refrigerator offers optimal freshness when you store them in an airtight container. Parchment or waxed paper between layers prevents sticking when you stack multiple layers.
Room temperature storage needs these guidelines:
- Use an airtight container to maintain freshness
- Keep away from direct sunlight and heat
- Maintain room temperature between 65-70°F
- Check regularly for any texture changes
Freezing and thawing methods
Special occasions need advance preparation, and freezing substantially extends your candy’s life. These steps make freezing simple:
- Place finished candies on a wax paper-lined baking sheet
- Flash freeze for 20-30 minutes
- Transfer to a freezer-safe container or ziplock bag
- Layer with parchment paper between rows
- Seal tightly, removing excess air
Your Martha Washington candy stays fresh in the freezer for up to three months. Proper thawing is vital to enjoy them. The refrigerator needs at least two hours to thaw them before serving. Better results come from overnight thawing.
Shelf life guidelines
Storage methods affect your candies’ freshness duration:
Refrigerator Storage: An airtight container in the refrigerator keeps your Martha Washington candy fresh for up to two weeks. Wax paper between layers prevents sticking.
Room Temperature: Refrigeration gives longer shelf life though some recipes suggest room temperature storage. Room temperature storage needs consumption within 10-14 days.
Make-Ahead Tips: Advanced planning works well with this candy. The centers freeze well without chocolate coating. You can thaw the centers in the refrigerator and add the chocolate coating when needed. This method offers flexibility and fresh-tasting results.
Quality checks should look for these signs to make a fresh batch:
- Changes in chocolate appearance
- Softening or hardening of centers
- Any unusual odors
- Texture changes in the filling
Date labels on storage containers help track freshness. Your Martha Washington candy tastes best when you monitor its storage time. Smaller batches maintain better freshness throughout your serving period than one large batch.
Common Mistakes and How to Avoid Them
Making Martha Washington candy can challenge even seasoned candy makers. Learning about common mistakes will help you create perfect candies every time.
Temperature control issues
The success of your Martha Washington candy depends on temperature management. Chocolate needs precise handling – dark chocolate must reach 88-90°F to temper correctly. Your chocolate coating might not set right if your room feels too warm. The ideal room temperature should stay between 65-68°F.
These temperature problems pop up often:
- Chocolate seizes from too much heat
- Centers turn too soft during dipping
- Uneven coating because of wrong chocolate temperature
- Texture goes wrong in humid weather
You should adjust your candy thermometer before starting. Drop it in boiling water – it needs to show 212°F at sea level. The cooking temperatures need adjustment at high altitudes – drop one degree for each 500 feet above sea level.
Texture problems and solutions
The mixture’s consistency shapes your final product. A too-gooey mix needs more powdered sugar, added one tablespoon at a time, until it feels like cookie dough. Be careful though – extra sugar changes both sweetness and texture.
Here’s how to fix texture issues:
- Check your ingredient ratios
- Make sure it chills long enough (minimum 1 hour)
- Watch room temperature and humidity
- Add powdered sugar bit by bit
- Test consistency before moving forward
Pick a dry day to make your candy. Humidity slows setting time and leaves candies sticky. Put your mixture back in the fridge right away if it starts getting too soft.
Coating mishaps and fixes
Most coating problems come from poor tempering or temperature control. Melt chocolate at 30% power in your microwave to avoid burning. White spots or streaks on finished candies show bad tempering or temperature changes during storage.
Smooth, professional coatings need these steps:
- Keep water away from melted chocolate
- Handle small batches (8-10 pieces at a time)
- Keep centers cold between dips
- Stay at the right chocolate temperature
Thick chocolate shouldn’t get water added. Heat it slowly in 15-second bursts until it flows right. A bit of vegetable oil or food-grade paraffin helps smooth out your chocolate coating.
A fork or slotted spoon removes extra chocolate while dipping. Tap it gently for even coating and scrape the fork’s bottom on the bowl’s edge to stop pooling. You’ll need to trim off pooled chocolate at the bottom after it sets.
Good storage keeps coating quality high. Put finished candies in airtight containers with parchment paper between layers. Freezing might work, but chocolate often gets white spots or turns ‘sweaty’ while thawing.
Your cherries must be drained well and patted dry before mixing them in. Extra moisture from cherries can ruin texture and stop coating from sticking properly. A crockpot half-filled with hot water helps keep chocolate at perfect dipping temperature throughout the process.
Conclusion
Making Martha Washington candy might seem daunting at first. The classic confection becomes simple with proper techniques and careful attention to detail. Your success relies on quality ingredients, precise temperature control, and patience throughout the process.
The life of your candies extends substantially with proper storage. Your refrigerated treats will stay fresh for two weeks, while frozen ones last up to three months. The right temperature during preparation and storage will give professional-looking results every time.
This complete guide helps you create these beloved Southern treats with confidence. You should start with small batches to perfect your technique. Your Martha Washington candies will soon rival any professional confection. Each batch brings you closer to becoming skilled at this timeless recipe that brings joy to family and friends alike.
FAQs
Q1. What are the key ingredients needed for Martha Washington candy? The main ingredients for Martha Washington candy include butter, confectioners’ sugar, sweetened condensed milk, vanilla extract, shredded coconut, chopped pecans, and high-quality semi-sweet chocolate for coating.
Q2. How long should I chill the candy mixture before shaping? Chill the Martha Washington candy mixture for at least 2-3 hours in the refrigerator before shaping. For best results, you can even chill it overnight to develop the right consistency.
Q3. What’s the best way to achieve a smooth chocolate coating? For a smooth chocolate coating, properly temper the chocolate, maintain the correct working temperature (88-91°F for dark chocolate), and use a fork or professional dipping tools. Dip chilled centers completely, tap gently to remove excess, and place on parchment-lined sheets.
Q4. How should I store Martha Washington candy? Store Martha Washington candy in an airtight container in the refrigerator for up to two weeks. When freezing, they can last up to three months. Always separate layers with parchment or wax paper to prevent sticking.
Q5. What are common mistakes to avoid when making Martha Washington candy? Common mistakes include improper temperature control, incorrect mixture consistency, and coating issues. Ensure proper ingredient ratios, maintain the right working temperatures for both the mixture and chocolate, and work in a cool, dry environment to avoid texture and coating problems.
Print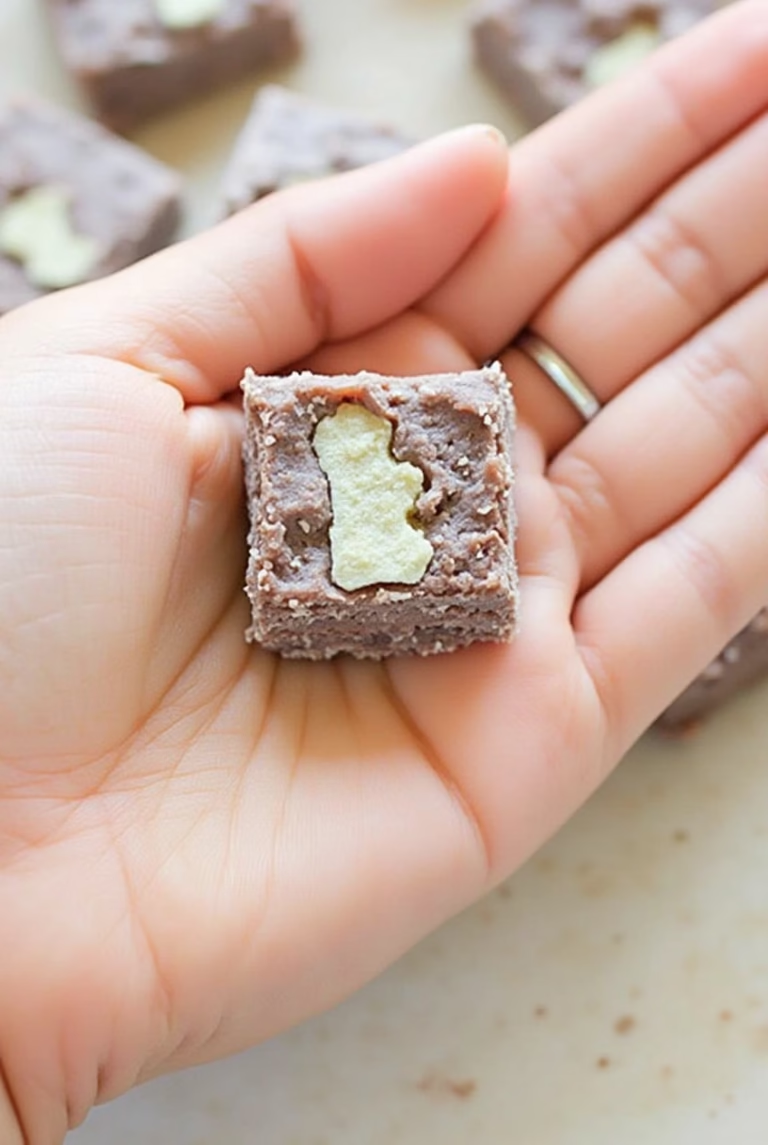
7 Irresistible Steps to Perfect Martha Washington Candy for Beginners
A classic Southern treat featuring a creamy coconut and pecan center coated in rich, smooth chocolate. Perfect for holidays, special occasions, or gifting.
- Total Time: 3 hours 10 minutes
- Yield: 60 candies 1x
Ingredients
- 1 cup unsalted butter, softened
- 2 lbs confectioners’ sugar
- 1 can (14 oz) sweetened condensed milk
- 1 tsp vanilla extract
- 2 cups sweetened shredded coconut
- 2 cups chopped pecans
- 24 oz high-quality semi-sweet chocolate chips or candy coating
Instructions
- In a stand mixer, beat softened butter and confectioners’ sugar until smooth.
- Mix in sweetened condensed milk and vanilla extract until well combined.
- Fold in shredded coconut and chopped pecans.
- Chill the mixture for 2-3 hours or overnight.
- Scoop 1-tablespoon portions and roll into balls. Place on parchment-lined baking sheets.
- Chill the balls for 30 minutes.
- Melt and temper the chocolate to 88-91°F.
- Dip the chilled balls in chocolate, tapping off excess.
- Place coated candies on parchment paper to set.
- Store in an airtight container in the refrigerator for up to 2 weeks.
Notes
- Dust hands with powdered sugar to prevent sticking while rolling.
- Chill the candy mixture if it becomes too soft.
- Freeze uncoated centers for up to 3 months for make-ahead prep.
- Prep Time: 3 hours (including chilling)
- Cook Time: 10 minutes (melting chocolate)
- Category: Dessert, Candy
- Method: No-Bake
- Cuisine: Southern, American
- Diet: Vegetarian
Nutrition
- Serving Size: 1 candy
- Calories: 150 kcal
- Sugar: 14g
- Sodium: 10mg
- Fat: 9g
- Saturated Fat: 4g
- Unsaturated Fat: 4g
- Carbohydrates: 17g
- Fiber: 1g
- Protein: 1g
- Cholesterol: 10mg