A Recipe for Busy Weeknights That Doesn’t Compromise Flavor
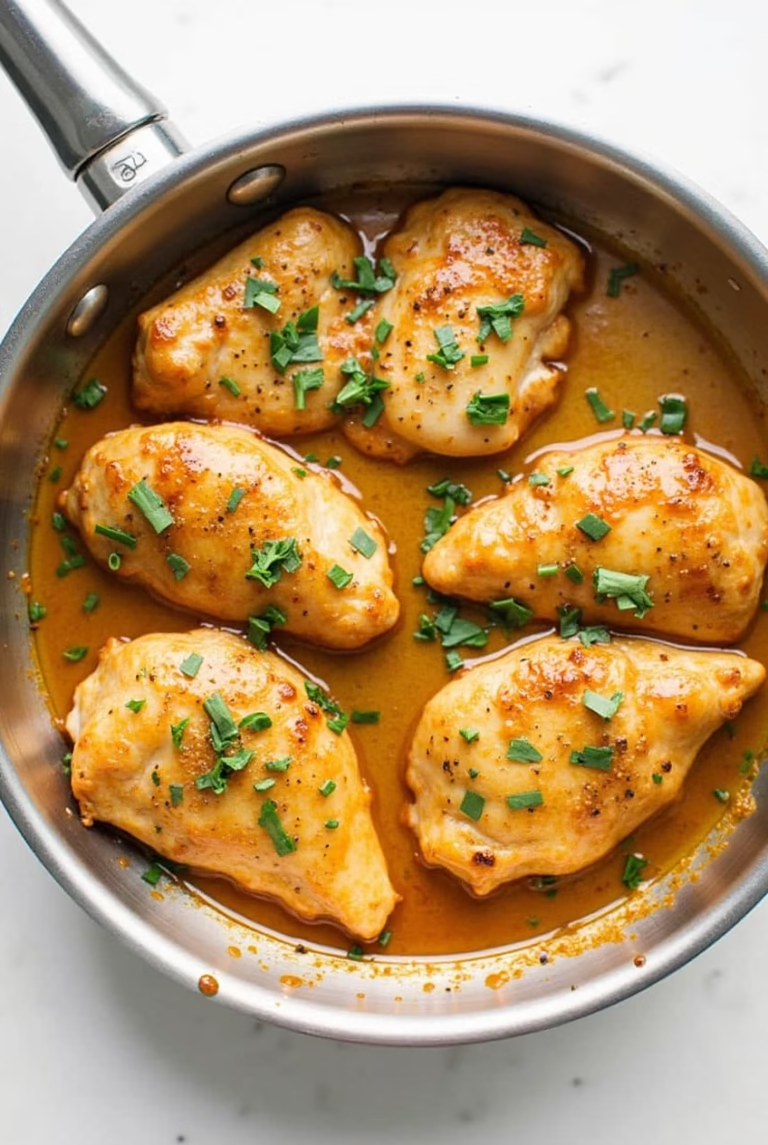
Picture this: it’s a hectic weeknight, the clock is ticking, and everyone in the house is asking, what’s for dinner? That’s where One-Pan Honey Garlic Chicken comes swooping in like a superhero. This recipe combines the sweet and savory magic of a honey garlic sauce with tender chicken, and the best part? You’ll only need one pan to make it. Say goodbye to a mountain of dishes and hello to an incredibly satisfying, flavorful meal that’s perfect for busy families, dinner parties, or lazy weekends.
This dish excels in versatility, quick prep, and global appeal, making it a go-to recipe when you’re short on time but crave bold, unforgettable flavors. With just a handful of simple pantry staples, you can whip up this masterpiece in under 30 minutes. Sound too good to be true? Keep reading to learn why One-Pan Honey Garlic Chicken deserves a spot in your weekly rotation.
Not only is it a time-saver, but it’s also healthy, approachable, and foolproof. Made with protein-rich chicken, this dish is a great way to satisfy a craving for takeout while staying in control of your ingredients. Plus, the dreamy honey garlic sauce is a kid-approved favorite that’s guaranteed to leave plates spotless.
Why You’ll Love This One-Pan Honey Garlic Chicken
Why is One-Pan Honey Garlic Chicken a must-try? Let us count the reasons and trust us, there are plenty!
1. Quick and Easy:
From start to finish, this recipe takes just 30 minutes to prepare. With minimal prep and cooking time, it’s ideal for weeknights when convenience is key.
2. One-Pan Minimalism:
Nobody likes spending more time washing dishes than eating. This recipe only requires one skillet or pan, which means fewer dishes to clean and more time to kick back after dinner.
3. Kid-Friendly:
The combination of sweet honey and savory garlic is a winner with everyone at the table, including picky eaters.
4. Wholesome Ingredients:
This dish strikes the perfect balance between indulgent and nutritious! It uses natural sweeteners, lean protein, and can easily be paired with vegetables or whole-grain sides for a complete meal.
5. Customizable:
Whether you’re gluten-free, dairy-free, or just looking to get creative in the kitchen, this recipe offers room for personalization (more on that below!).
6. Great for Leftovers:
If you’re fortunate enough to have leftovers, the flavors only get better the next day. Plus, it reheats perfectly, making it an ideal meal-prep recipe.
7. Restaurant-Quality at Home:
The rich, glossy honey garlic sauce tastes like something you’d find in a fancy restaurant without the hefty price tag.
Ingredients
One of the biggest perks of One-Pan Honey Garlic Chicken is how approachable the ingredient list is. You probably have most items in your kitchen already!
The Essentials:
- Chicken Thighs or Breasts:
Use bone-in, skin-on chicken thighs for extra flavor and juiciness, or go for boneless, skinless thighs or breasts for faster cooking. - Honey:
Choose a high-quality honey for maximum flavor local or raw varieties work beautifully. - Garlic:
Fresh garlic is essential for that savory punch of flavor. Opt for 3–4 cloves. - Soy Sauce:
Adds depth and umami to the sauce. Use low-sodium if you’d like to control the salt content. For gluten-free, swap soy sauce with tamari or coconut aminos. - Apple Cider Vinegar:
Balances the sweetness of the honey with just the right tanginess. If you’re out of apple cider vinegar, rice vinegar works as a substitute.
Optional Add-In Ingredients:
- Sesame Seeds (for garnish)
- Fresh Parsley or Scallions (for garnish)
- Red Pepper Flakes (if you like a hint of heat)
Quick Pro Tip:
When sourcing ingredients, fresher is better! Fresh garlic and high-quality honey create the boldest flavors.
Step-by-Step Instructions
Mastering One-Pan Honey Garlic Chicken is a breeze if you follow these simple steps. You’ll end up with perfectly juicy chicken drenched in a delectable sauce.
Step 1: Prepare Your Ingredients
Before turning on the stove, make sure you have everything prepped. Mince your garlic, measure out your honey, and pat the chicken thighs dry with paper towels to ensure a nice sear.
Step 2: Brown the Chicken
Heat 1–2 tablespoons of oil in a large skillet or pan over medium-high heat. Season your chicken with a pinch of salt and pepper, then sear it skin-side down (if using skin-on thighs) until golden brown, about 4–5 minutes per side. Remove the chicken and set it aside.
Step 3: Make the Honey Garlic Sauce
In the same pan, reduce the heat to medium and toss in your minced garlic. Sauté for 1 minute, or until fragrant, then pour in the honey, soy sauce, and apple cider vinegar. Stir to combine and let the mixture come to a gentle simmer.
Step 4: Return the Chicken to the Pan
Nestle the browned chicken back into the sauce, ensuring it’s well-coated. Cover the pan with a lid and let the chicken cook through (about 10–15 minutes, depending on the cut).
Step 5: Thicken the Sauce (Optional)
Want a thicker sauce? Remove the chicken once cooked and let the sauce continue to simmer for an additional 2–3 minutes until it reduces slightly.
Step 6: Garnish and Serve
Plate your chicken, drizzle with the remaining sauce, and sprinkle with sesame seeds or chopped parsley if desired. Serve over rice, noodles, or steamed veggies for a complete meal!
Expert Tips
To take your One-Pan Honey Garlic Chicken to the next level, keep these tips in mind:
- Pat Chicken Dry First: A dry surface ensures even browning.
- Don’t Overcrowd the Pan: Work in batches if you’re making a larger portion. Overcrowding drops the pan temperature, leading to soggy chicken instead of a crispy exterior.
- Rest After Cooking: Once cooked, let your chicken rest for 5 minutes before serving. This ensures it stays juicy.
- Taste as You Go: Everyone’s sauce preferences vary. Start with the recommended amounts for honey and soy sauce and adjust according to taste.
Variations
Customization is key with One-Pan Honey Garlic Chicken, so feel free to make it your own:
1. Vegetarian Version:
Swap chicken with firm tofu or even cauliflower florets for a veggie-friendly version.
2. Gluten-Free Swap:
Use tamari or coconut aminos instead of soy sauce.
3. Add Veggies:
Throw in broccoli, snap peas, or bell peppers during the final few minutes of cooking to make it a one-pan meal.
4. Spice It Up:
Add a teaspoon of sriracha or red pepper flakes to the sauce for an extra kick.
5. Sticky Orange Honey Chicken:
Replace some of the honey with orange juice and add a little orange zest for a citrus twist.
Serving Suggestions
Wondering what pairs best with One-Pan Honey Garlic Chicken? Here are some ideas to complete your meal:
- Steamed Jasmine Rice: The fluffy texture soaks up the sauce beautifully.
- Garlic Noodles: Toss some cooked noodles in garlic butter for a carb-loaded side.
- Roasted Veggies: Sweet potatoes, zucchini, or asparagus complement the dish’s flavors.
- Side Salad: A refreshing green salad with a light vinaigrette balances the richness of the dish.
FAQ
Can I make this recipe in advance?
Yes! The sauce flavors develop beautifully as it sits, making it a great make-ahead dish. Store in an airtight container in the fridge for up to 3 days.
How do I reheat leftovers?
Reheat the chicken and sauce on the stovetop over low heat, adding a splash of water if the sauce has thickened too much in the fridge.
Can I freeze this dish?
Absolutely! Once cooled, store your chicken and sauce in a freezer-safe container for up to 2 months. Thaw overnight in the fridge before reheating.
Can I substitute the chicken?
Yes! Boneless pork chops or salmon fillets work wonderfully with this recipe. Just adjust cooking times accordingly.
Conclusion
Fast, flavorful, and unfailingly delicious, One-Pan Honey Garlic Chicken is the ultimate weeknight winner you’ll return to time and time again. With minimal effort and maximum flavor, this dish proves that great home-cooked meals don’t have to be complicated.
Ready to make this delicious recipe? Gather your ingredients, heat up your skillet, and enjoy the process of creating a meal that’s not only comforting but also quick and healthy. Whether you’re feeding a crowd, preparing a romantic dinner, or simply treating yourself after a long day, One-Pan Honey Garlic Chicken fits every occasion.
Don’t forget to experiment with variations, garnish creatively, and share your unique spins on this recipe with your friends and family. And if you do give this recipe a go, we’d love to hear how it turned out! Snap a picture, tag us on social media, and show off your culinary masterpiece.
Happy cooking, and here’s to stress-free, flavorful meals that bring people together around the table. Cheers! 🍯🍗
Print7 Reasons to Try One-Pan Honey Garlic Chicken: Your Quick Weeknight Winner
This One-Pan Honey Garlic Chicken is a quick and easy weeknight dinner that doesn’t compromise on flavor. With tender chicken and a sweet, savory honey garlic sauce, this dish is ready in under 30 minutes, requires minimal cleanup, and is kid-approved. Perfect for busy families, casual dinner parties, or meal prep!
- Total Time: 30 minutes
- Yield: 4 servings
Ingredients
- Chicken Thighs or Breasts (bone-in, skin-on for extra flavor or boneless for quicker cooking)
- Honey (high-quality, local or raw for maximum flavor)
- Garlic (3–4 fresh cloves, minced)
- Soy Sauce (low-sodium; substitute tamari or coconut aminos for gluten-free)
- Apple Cider Vinegar (or rice vinegar as a substitute)
- Optional:
- Sesame seeds (for garnish)
- Fresh parsley or scallions (for garnish)
- Red pepper flakes (if you like a hint of heat)
Instructions
- Prepare Ingredients: Mince garlic, measure honey, and pat chicken dry with paper towels.
- Brown the Chicken: Heat oil in a skillet over medium-high heat, season chicken with salt and pepper, and sear skin-side down for 4–5 minutes per side. Remove and set aside.
- Make the Sauce: Reduce heat to medium, sauté minced garlic for 1 minute, then stir in honey, soy sauce, and apple cider vinegar. Simmer gently.
- Cook the Chicken: Return chicken to the pan, coat with sauce, cover, and cook for 10–15 minutes.
- Thicken Sauce (Optional): Remove chicken and simmer the sauce for 2–3 more minutes until it reduces.
- Garnish and Serve: Serve chicken drizzled with sauce and garnished with sesame seeds or parsley. Pair with rice, noodles, or vegetables.
Notes
- Pro Tip: Pat chicken dry to ensure even browning.
- Avoid overcrowding the pan to maintain heat for crispier chicken.
- Adjust honey and soy sauce to taste as the sauce simmers.
- Let chicken rest for 5 minutes before serving for juicier results.
- For meal prep: Reheats well on the stovetop, and sauce thickens nicely after storage.
- Prep Time: 10 minutes
- Cook Time: 20 minutes
- Category: Dinner, Main Course
- Method: One-Pan, Skillet
- Cuisine: Asian-Inspired
- Diet: Gluten Free
Nutrition
- Serving Size: 1 portion
- Calories: ~350
- Sugar: ~15g
- Sodium: ~700mg (adjust based on soy sauce used)
- Fat: ~10g
- Saturated Fat: ~2g
- Unsaturated Fat: ~8g
- Trans Fat: 0g
- Carbohydrates: ~20g
- Fiber: 0g
- Protein: ~30g
- Cholesterol: ~90mg