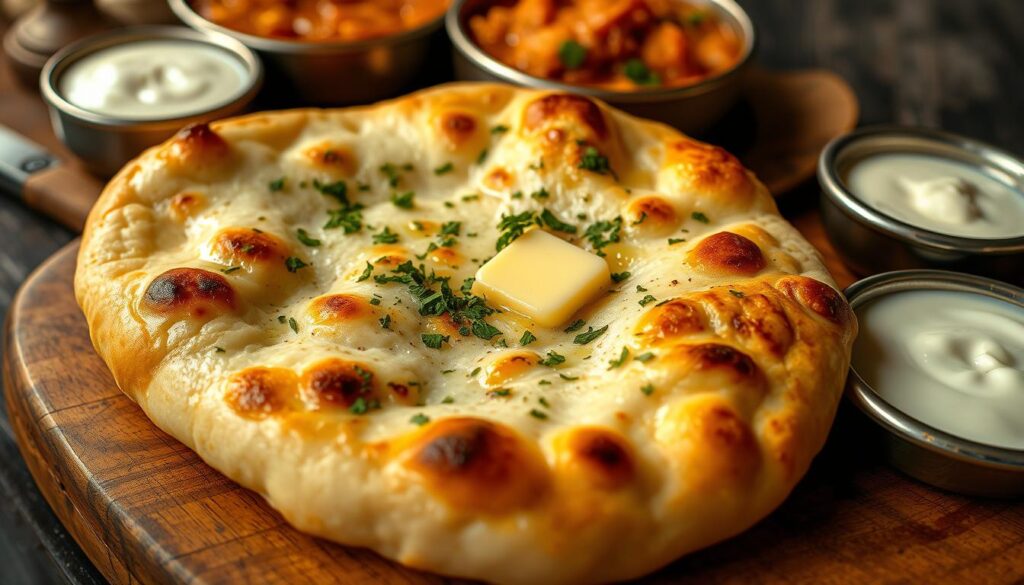
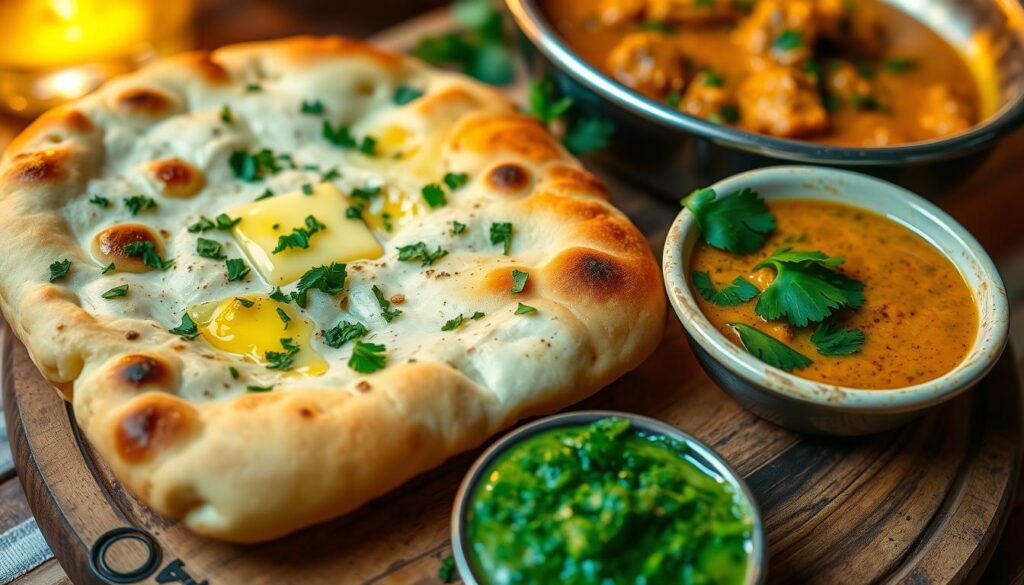
Imagine biting into a warm, fresh naan bread. The garlic smell fills the air. Homemade garlic naan is a favorite in many homes. It’s soft, pillowy, and has a delicious garlic butter on it.
In this article, we’ll explore naan’s rich history. We’ll also look at the key ingredients and techniques for making it. You’ll learn how to make this Indian treat in your kitchen.
Key Takeaways
- Discover the ancient origins and cultural significance of naan bread in Indian cuisine.
- Learn the essential ingredients and step-by-step process for making soft, buttery homemade garlic naan.
- Explore traditional and modern baking methods, as well as the must-have tools and equipment for naan making.
- Uncover the secrets to the perfect garlic butter mixture and master the art of rolling and shaping naan.
- Discover the best cooking techniques for achieving the perfect char and serving suggestions for your homemade garlic naan.
The Rich History of Traditional Indian Flatbread
The origins of the beloved Indian flatbread, known as naan, go back to ancient India. This bread has been a key part of Indian food for centuries. It has grown from its roots in tandoor ovens to becoming loved around the world.
Origins of Naan in Ancient India
Naan’s story begins in the 16th century, during the Mughal Empire. But some think it might have started even earlier, around 3000 BC. The name “naan” comes from Persian, showing the cultural mix that shaped it.
Evolution from Tandoor to Modern Kitchen
Traditionally, tandoor naan was baked in clay ovens. This gave it a smoky taste and soft texture. Now, with modern kitchens, people can make naan at home, keeping its flavor alive.
Cultural Significance in Indian Cuisine
Naan is a big deal in Indian food culture. It goes well with many dishes, like curries and kebabs. Its ability to absorb flavors makes it a favorite in homes and restaurants everywhere.
Essential Ingredients for Perfect Garlic Naan Bread
Making the perfect garlic naan starts with the right ingredients. You need flour, yeast, and yogurt for a soft, pillowy texture. Let’s explore the key components for a great naan at home.
The flour you choose is important. While all-purpose flour works, traditional naan recipes often use bread flour or high-protein all-purpose flour. This helps make the dough chewy and elastic, just right for naan.
Active dry yeast is key for the rise and airy texture of naan. It works with the dough’s sugars to create air pockets, making naan so appealing.
Plain yogurt adds a tang and moisture to the dough. It tenderizes the dough and enriches the flavors, making the naan even better.
The garlic is what makes garlic naan special. Use fresh, minced garlic or a garlic-herb blend for a fragrant kick.
With these ingredients, you’re ready to make delicious homemade garlic naan. It will take you straight to India with every bite.
Kitchen Tools and Equipment You’ll Need
To bake tasty naan bread at home, you need the right tools. Even without a tandoor naan oven, you can still make great naan. Just use a few key utensils.
Traditional vs Modern Baking Methods
The traditional tandoor naan is baked in a clay oven. This gives it a smoky flavor and a charred look. At home, a cast-iron skillet or baking stone can help you get similar results.
Must-Have Utensils for Naan Making
- Rolling pin: Essential for shaping the dough into thin, even naan rounds.
- Baking stone or cast-iron skillet: Provides the high heat needed to mimic a tandoor oven.
- Dough scraper: Helps divide and shape the dough without sticking.
- Pastry brush: Allows for even application of the garlic butter mixture.
- Wooden or silicone spatula: Useful for transferring the naan to the cooking surface and flipping.
With the right tools and a bit of practice, you can make delicious tandoor naan at home. Enjoy freshly baked baking naan in your own kitchen.
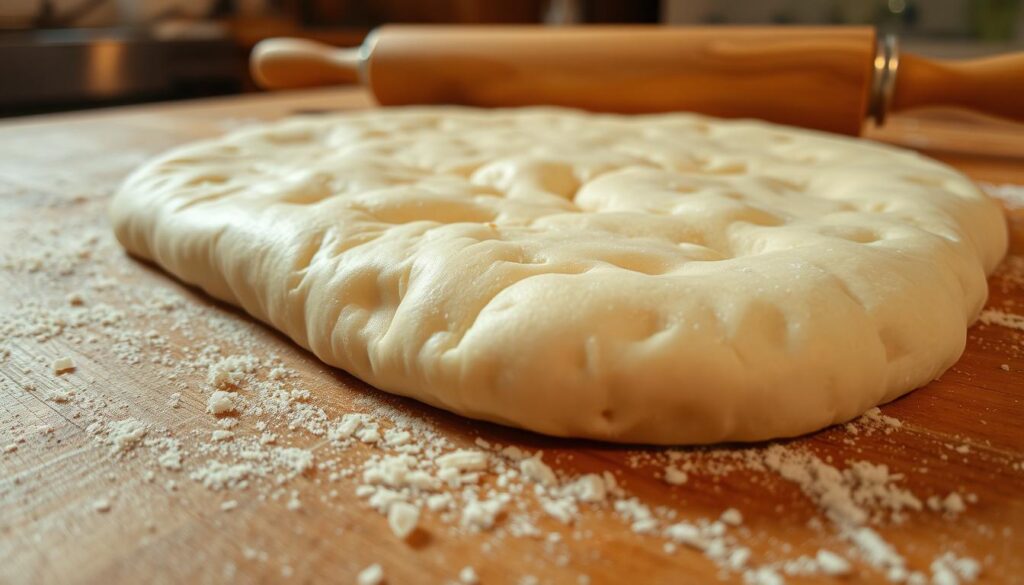
Step-by-Step Dough Preparation Process
Making the perfect naan dough is key to a tasty garlic naan recipe. This guide will show you how to knead and proof the dough. You’ll get a soft, pillowy texture that’s loved by many.
Start by mixing dry ingredients like flour, yeast, and salt in a big bowl. Add warm milk, yogurt, and melted butter. This will make a shaggy dough. Then, knead the dough on a floured surface for 10 minutes. It should become smooth and elastic.
- Put the kneaded dough in a greased bowl, cover it with a damp cloth. Let it proof for 1-2 hours, or until it doubles in size.
- After proofing, punch down the dough to get rid of air bubbles. Split it into balls, each about 6-8 ounces.
- Roll each ball into an oval or round shape, about 1/4-inch thick, on a floured surface.
The secret to great naan dough is finding the right mix of moisture and gluten. By following these steps, you’ll get a dough that’s easy to work with. It will make your garlic naan recipe soft and delicious, just like in a restaurant.
Mastering the Garlic Butter Mixture
Creating the perfect garlic naan bread starts with the garlic butter mixture. This topping boosts the aroma and adds richness to the traditional Indian flatbread. Let’s dive into mastering this key component.
Selecting the Right Garlic
For a great garlic butter naan, use fresh, quality garlic. Choose plump, juicy cloves that are freshly peeled and minced. The garlic’s size and intensity affect the taste, so adjust it to your liking.
Creating the Perfect Herb Blend
- A good herb blend can take your garlic naan bread to the next level. Try adding fresh parsley, cilantro, or a bit of rosemary or thyme.
- Chop the herbs finely and mix them into the softened butter. This ensures they’re evenly spread.
- Play with different herb mixes to find the perfect match for your naan’s flavors.
Butter Temperature Tips
The butter’s temperature is key for the garlic butter naan‘s texture and spreadability. Use softened, room-temperature butter for the best results. Cold butter makes spreading hard, while warm butter can make it greasy.
Mastering the garlic butter mixture can take your homemade garlic naan bread to new heights. Enjoy the perfect mix of aromatic garlic, fragrant herbs, and creamy butter with every bite.
Rolling and Shaping Techniques
Learning to roll and shape naan dough is key to getting that soft, fluffy texture. Start with dough that’s well-proofed and has risen fully. This lets it develop the right amount of gluten.
Before you start, dust your work area and rolling pin with flour. This keeps the dough from sticking. Split the dough into pieces, each about 4-6 ounces. Shape each piece into a ball with your hands.
Next, use a rolling pin to shape the dough into a teardrop. Try to make it about 1/4 inch thick. This is important for the naan’s texture.
- Lightly flour your work surface and rolling pin to prevent sticking.
- Divide the naan dough into equal portions, around 4-6 ounces each.
- Gently shape each portion into a smooth ball using your hands.
- Roll out the dough into a teardrop shape, maintaining a thickness of about 1/4 inch.
Be gentle when handling the dough to avoid tears or unevenness. If it sticks, add more flour to your surface and rolling pin. With time, you’ll get the hang of making perfect naan dough into delicious Indian flatbread.
Cooking Methods and Temperature Guide
Baking the perfect naan bread requires the right cooking method and temperature. This ensures the right texture and flavor. Let’s look at the different ways to make naan and how to get that perfect char.
Stovetop vs Oven Methods
The traditional way to cook tandoor naan is on a stovetop. Use a heavy-bottomed skillet or griddle for direct heat. This method gives a beautifully charred and bubbly surface. Aim for a temperature of 400°F to 450°F (200°C to 230°C) on the stovetop.
You can also bake naan in a preheated oven. This is great for making large batches or without a stovetop. Set your oven to 450°F to 500°F (230°C to 260°C) for intense heat like a tandoor.
Achieving the Perfect Char
To get that tandoor-baked look and taste, you need a charred crust. Here are some tips for the perfect char:
- Use a preheated, heavy-duty pan or baking sheet for even heat.
- Brush the naan dough with melted butter or oil before cooking.
- Watch the naan closely while cooking, flipping or rotating it for even char.
- For stovetop, use high heat and cook for 2-3 minutes per side.
- In the oven, place the naan on the top rack for char.
With the right cooking method and temperature, you’ll make naan bread that’s crisp outside and soft inside.
Serving Suggestions and Pairing Options
The garlic naan bread is a delicious Indian flatbread. It’s perfect for dinner parties or a tasty snack. This Indian flatbread can be enjoyed in many ways.
Garlic naan is great with curries, stews, or lentils. Its soft texture and garlic flavor match well with these dishes. Try it with butter chicken, dal, or lamb vindaloo for a traditional taste.
But there’s more to garlic naan. You can top it with roasted veggies, grilled meats, or a fried egg. It’s great with many cuisines, like Mediterranean or Mexican.
For a quick snack, pair garlic naan with dips and chutneys. It goes well with yogurt raitas, spicy chutneys, or hummus. This makes a tasty appetizer or side dish.
Homemade garlic naan bread will wow your guests. It brings authentic Indian flatbread flavors to your table.
| Pairing Suggestions | Serving Ideas |
|---|---|
| Curries (butter chicken, lamb vindaloo, etc.) Stews and lentil dishes Grilled meats and vegetables Chutneys and dips (yogurt raita, hummus, etc.) | Serve warm, straight from the oven Cut into wedges for dipping Use as a base for fusion dishes Tear and scoop up curries and stews |
Conclusion
As we wrap up our exploration of homemade garlic naan bread, I hope you now appreciate this tasty Indian flatbread more. It’s not just a food; it’s a journey from ancient traditions to today’s flavors. Making your own garlic naan at home is a rewarding adventure.
The secret to its soft, buttery texture and garlic scent is in the dough, shaping, and cooking. The garlic naan recipe we’ve shared is a classic. But don’t be afraid to try new things. Add more garlic, mix in different herbs, or bake it in your oven for a unique twist.
Remember, the naan calories and naan nutrition are great, making it a healthy and tasty choice for your meals.
So, grab your apron, turn on your stove, and start making your own garlic naan. Enjoy the journey, the smells, and share it with loved ones. Bon appétit!
FAQ
What is the history and cultural significance of naan bread?
Naan bread comes from ancient India. It was baked in a tandoor, or clay oven. Over time, it became a beloved part of Indian cuisine. It symbolizes hospitality and goes well with many dishes.
What are the essential ingredients needed to make homemade garlic naan?
To make garlic naan, you need flour, yeast, yogurt, milk, salt, and garlic. These ingredients make the dough soft, chewy, and flavorful.
What kitchen tools and equipment are necessary for baking naan?
You can bake naan at home with a cast-iron skillet, baking steel, or oven. You’ll also need a rolling pin, pastry brush, and tongs for handling hot naan.
How do I prepare the naan dough properly?
First, mix the dry ingredients and add the wet ones. Then, knead until it’s right. Let the dough rest and proof for the best texture and rise.
How do I make the garlic butter topping for naan?
Mix minced garlic with melted butter and herbs for the topping. The butter should be warm to melt into the naan.
What are the best techniques for rolling and shaping naan?
Roll the dough to the right thickness. Use stretching motions to shape it like a teardrop. Handling the dough gently is key to avoid sticking.
What are the different cooking methods for baking naan?
You can cook naan on the stovetop, in the oven, or on a grill. Each method needs specific settings for the perfect texture and flavor.
How can I serve and pair homemade garlic naan?
Enjoy garlic naan on its own, with dips, or as a base for dishes. It goes well with many cuisines, making it great for any meal.
Print
Homemade Garlic Naan Bread
Experience the authentic taste of India with this soft, pillowy Homemade Garlic Naan Bread. Infused with aromatic garlic butter and made with simple ingredients, this naan pairs perfectly with curries, stews, and grilled dishes. Learn how to master this restaurant-style flatbread right in your own kitchen!
- Total Time: 1 hour 30 minutes
- Yield: 6-8 naan breads 1x
Ingredients
- 2 cups bread flour or high-protein all-purpose flour
- 1 teaspoon active dry yeast
- 1 teaspoon sugar
- 1/2 teaspoon salt
- 1/4 cup warm milk
- 1/4 cup plain yogurt
- 2 tablespoons melted butter (for dough)
- 3 tablespoons softened butter (for garlic butter)
- 3 cloves garlic, minced
- 1 tablespoon chopped fresh parsley or cilantro (optional)
Instructions
- Prepare Dough: In a large bowl, combine flour, yeast, sugar, and salt. Add warm milk, yogurt, and melted butter. Mix until a shaggy dough forms.
- Knead Dough: Knead the dough on a floured surface for 10 minutes until smooth and elastic.
- Proof Dough: Place the dough in a greased bowl, cover with a damp cloth, and let it rise for 1-2 hours until doubled in size.
- Divide and Roll: Punch down the dough and divide it into 6-8 equal balls. Roll each ball into a teardrop shape about 1/4-inch thick.
- Prepare Garlic Butter: Mix softened butter with minced garlic and chopped herbs.
- Cook Naan: Heat a cast-iron skillet over medium-high heat. Cook each naan for 2-3 minutes on one side until bubbles form, then flip and cook for another 1-2 minutes.
- Brush with Garlic Butter: While hot, brush each naan with the garlic butter mixture.
- Serve: Enjoy warm with curries, stews, or as a snack with dips.
Notes
- Use bread flour for a chewier texture.
- For extra flavor, add more garlic or experiment with different herbs.
- Naan can be baked in the oven at 500°F (260°C) for a crispier texture.
- Prep Time: 1 hour 15 minutes
- Cook Time: 15 minutes
- Category: Bread, Side Dish
- Method: Stovetop, Skillet
- Cuisine: Indian
- Diet: Vegetarian
Nutrition
- Serving Size: 1 piece
- Calories: 210 kcal
- Sugar: 1g
- Sodium: 180mg
- Fat: 7g
- Saturated Fat: 4g
- Unsaturated Fat: 2g
- Trans Fat: 0g
- Carbohydrates: 30g
- Fiber: 1g
- Protein: 5g
- Cholesterol: 15mg