As the aroma of freshly baked bread fills the air, my mouth waters in anticipation. Growing up, the smell of homemade garlic bread rolls was a familiar comfort. It instantly took me back to cozy family dinners and cherished moments shared around the table. Now, I’m thrilled to share with you a recipe that captures that same warm, inviting essence.
This recipe for soft, fluffy garlic butter bread rolls is surprisingly easy to make at home. These garlic butter rolls are the perfect addition to any meal. Whether you’re hosting a holiday gathering or just want to elevate your everyday dinner, they’re sure to impress your guests and become a new family favorite.
Key Takeaways
- Homemade garlic butter bread rolls are a crowd-pleasing side dish or snack
- The recipe is easy to make, with a total time of about 2 hours
- The rolls are soft, fluffy, and packed with fresh garlic flavor
- Baking the rolls in a cast-iron skillet or baking pan results in a professional, bakery-style presentation
- The rolls can be made ahead and frozen for up to 3 months
Why These Garlic Butter Bread Rolls Are Irresistible
Imagine biting into a soft, buttery buttery dinner rolls smothered in garlic herb butter. That’s what you get with these baked garlic rolls. They’re made with a rich dough and a garlic butter topping. This mix gives you a soft texture and a strong flavor.
Perfect for Special Occasions
These rolls are a real showstopper. They’re perfect for big events like Thanksgiving, Christmas, and Easter. Their rich taste and bakery-style look will have everyone asking for more.
Rich and Buttery Flavor Profile
The rolls’ amazing taste comes from whole milk, eggs, and lots of butter. This makes them buttery dinner rolls that are soft and melt in your mouth.
Bakery-Style Results at Home
Thanks to the special dough and baking steps, you can make baked garlic rolls that look like they came from a bakery. They have a golden outside and a soft inside. Your family and friends will love them.
Essential Ingredients for Perfect Rolls
Making delicious homemade garlic butter bread rolls begins with picking the right ingredients. You need a few key items for the perfect taste and texture:
- Instant yeast – This yeast makes the dough rise fast and evenly, giving you fluffy rolls.
- Fresh garlic cloves – Mince or chop several cloves of garlic for a savory, aromatic garlic butter.
- Fresh parsley – Chopped parsley adds a bright, herbaceous flavor to the garlic butter.
- Granulated sugar – A bit of sugar balances the flavors and feeds the yeast for a great rise.
- Milk – Use whole or 2% milk for richness and moisture in the dough.
- Unsalted butter – High-quality butter is crucial for the garlic butter’s flavor and texture.
Getting the right measurements is important for perfect garlic butter bread rolls. Using a kitchen scale is highly recommended for the best results.
Kitchen Tools and Equipment Needed
When we start baking garlic butter bread rolls, having the right kitchen tools and equipment is key. The right tools help us mix, shape, and bake the rolls perfectly. This ensures our homemade bread tastes like it came from a bakery.
Must-Have Mixing Tools
The stand mixer is at the center of our baking. It kneads the dough with ease, saving us time. A kitchen scale is also crucial for measuring ingredients, especially flour, for the right texture.
Baking Pans and Accessories
The baking pan is where the magic happens. A 9×13 inch baking pan or cast-iron skillet is perfect for our garlic butter rolls. Having measuring cups and spoons ensures we follow the recipe accurately.
Temperature Management Tools
Temperature control is vital for baking equipment for garlic rolls and kitchen tools for bread making. An oven thermometer ensures our oven is at the right temperature. It’s also important to check the rolls’ internal temperature for perfect doneness.
With these essential baking equipment and kitchen tools, we’re ready to make those irresistible garlic butter bread rolls. They’ll impress your friends and family.
Understanding Yeast and Proofing Process
For perfect yeast proofing and bread making techniques, knowing yeast’s role is key. In this Garlic Butter Bread Rolls recipe, instant yeast is the best choice. It works fast and doesn’t need extra steps.
The proofing step is vital for your rolls to rise right. Let the dough proof in a warm spot until it doubles in size. This usually takes 1-2 hours. To speed it up, use a warm oven at 200°F, then turn it off before adding the dough.
- The dough should triple in volume during the first rise, showing the yeast is working.
- Kneading the dough for 10-12 minutes makes it smooth and elastic, important for gluten.
- Dividing the dough into 12 parts makes baking even and gives a pro look.
A well-proofed dough is key for light, fluffy Garlic Butter Bread Rolls. With focus on yeast proofing and bread making techniques, you’ll get amazing results at home.
Step-by-Step Dough Preparation Method
Making homemade garlic bread rolls starts with the dough. This step is key for their rich flavor and fluffy texture.
Mixing and Kneading Techniques
Start by mixing dry ingredients like flour, sugar, and salt in a big bowl. Add warm milk, melted garlic butter, and an egg. Use a stand mixer with a dough hook to knead for 5-7 minutes. This makes the dough smooth and elastic.
If you’re kneading by hand, spend 8-10 minutes. This will also make the dough smooth and pliable.
First and Second Rise Tips
After kneading, put the dough in a greased bowl. Cover it and let it rise in a warm place for 1 to 1.5 hours. It should double in size.
Punch down the dough to get rid of air bubbles. Then, divide it into 12-16 parts. Shape each into a ball and put them close together in a greased pan. Cover and let them rise again for 30-45 minutes. They should puff up nicely.
Shaping Perfect Rolls
The secret to perfect rolls is in the shaping. Make sure the dough is smooth and tight when shaping. This helps them rise up tall and fluffy.
Making the Perfect Garlic Herb Butter
Elevate your homemade garlic butter bread rolls with a flavorful garlic herb butter. This simple condiment takes just minutes to prepare. It adds an unbeatable aroma and taste to the freshly baked rolls.
To make the garlic herb butter, start by melting 4 tablespoons of unsalted butter in a small saucepan over medium heat. Once the butter is melted, add 2 minced garlic cloves and sauté for about 2 minutes, stirring frequently, until the garlic becomes fragrant.
- Remove the pan from heat and stir in 2 tablespoons of fresh chopped parsley and 1 teaspoon of dried Italian seasoning. Season with a pinch of salt and black pepper to taste.
- The garlic herb butter is now ready to be brushed onto the freshly baked garlic butter bread rolls. Apply the butter multiple times to ensure maximum flavor infusion.
This homemade garlic herb butter takes the garlic butter bread rolls to new heights. It provides a rich, aromatic, and irresistible finishing touch. The melted butter allows the flavors to soak into the warm rolls, creating a bakery-worthy treat right at home.
| Ingredient | Quantity |
|---|---|
| Unsalted Butter | 4 tablespoons |
| Garlic Cloves, minced | 2 |
| Fresh Parsley, chopped | 2 tablespoons |
| Dried Italian Seasoning | 1 teaspoon |
| Salt and Black Pepper | To taste |
Baking Instructions and Temperature Guide
Baking the perfect homemade baking garlic rolls is all about finding the right temperature and timing. To get that golden-brown crust and fluffy inside, follow these key steps.
Optimal Baking Conditions
First, preheat your oven to 400°F (200°C). This high bread baking temperature is key for a great baking environment. It helps the rolls rise and get a beautiful crust.
- Place the shaped rolls on a parchment-lined baking sheet, leaving about 2 inches between each.
- Brush the tops with a beaten egg wash for a shiny, golden-brown look.
- Bake the rolls for 20 minutes, watching closely to avoid over-browning.
- For an even crisper crust, bake for an extra 3-4 minutes.
Visual Doneness Indicators
Perfectly baked baking garlic rolls depend on visual signs, not just time. Here’s what to look for:
- Golden-brown tops: The rolls should have a rich, golden-brown color on the outside.
- Hollow sound: Tapping the bottom of a roll should produce a hollow sound, showing it’s fully baked.
Right after taking the rolls out of the oven, brush them with the reserved garlic herb butter. This adds a burst of flavor.
Storage and Make-Ahead Tips
These homemade garlic butter bread rolls are a real treat. But what if you have leftovers or want to make them ahead of time? Don’t worry, I’ve got some useful tips to keep your rolls fresh and tasty.
These rolls are best enjoyed right after baking. But if you have leftovers, store them in an airtight container at room temperature for 2-3 days. This keeps them soft and full of garlic flavor.
For convenience, you can make the dough ahead of time. Just shape the rolls, put them in a baking dish, cover, and refrigerate overnight. Then, let the make-ahead bread rolls come to room temperature for 1-2 hours before baking. This makes it easy to have freshly baked rolls for your event or gathering.
To keep them even longer, freeze the baked rolls for up to 2-3 months. To reheat, thaw the frozen rolls in a 350°F oven, covered with foil, for 10-15 minutes. This way, you always have delicious garlic rolls ready to enjoy.
With these simple storage and make-ahead tips, you can enjoy these homemade garlic butter bread rolls anytime. They’re perfect for any occasion or a cozy snack. These rolls are sure to impress and satisfy everyone.
Conclusion
Homemade garlic butter bread rolls are a delightful treat for any meal. This easy recipe lets you make bakery-quality rolls at home. They’re perfect for special occasions or just when you want something tasty.
Success comes from knowing how to proof yeast and prepare the dough. Also, making the right garlic herb butter is key. Follow the steps to get that bakery-style texture and smell in your rolls.
These rolls are great as a snack, appetizer, or with your main dish. They offer a rich, buttery taste and are easy to make. Let these rolls become a favorite in your home. Impress your family and friends with your baking skills!
FAQ
What are the key ingredients in homemade garlic butter bread rolls?
The main ingredients are instant yeast, fresh garlic cloves, and parsley. You also need granulated sugar, milk, and high-quality butter. Using fresh ingredients is key for the best taste.
What essential tools are needed to make these garlic butter rolls?
You’ll need a stand mixer with a dough hook, a 9×13 baking pan or cast-iron skillet. Also, measuring cups and spoons, and a kitchen thermometer are important. A kitchen scale is best for measuring flour accurately.
How do I properly proof the dough for the best results?
Proofing is key. Let the dough rise in a warm place until it doubles in size. For quicker rising, use a warm oven at 200°F then turn it off. The dough should triple in volume during the first rise.
How do I make the garlic herb butter for these rolls?
To make the garlic herb butter, melt butter with minced garlic until it smells great. Add chopped parsley or Italian seasoning. Brush the rolls with this butter after baking to soak in the flavors.
How do I store these garlic butter bread rolls?
Serve the rolls fresh for the best taste. They can be stored in an airtight container at room temperature for 2-3 days. For make-ahead, shape the rolls and refrigerate overnight. Let them rise at room temperature before baking. Freeze baked rolls for up to 2-3 months.
Print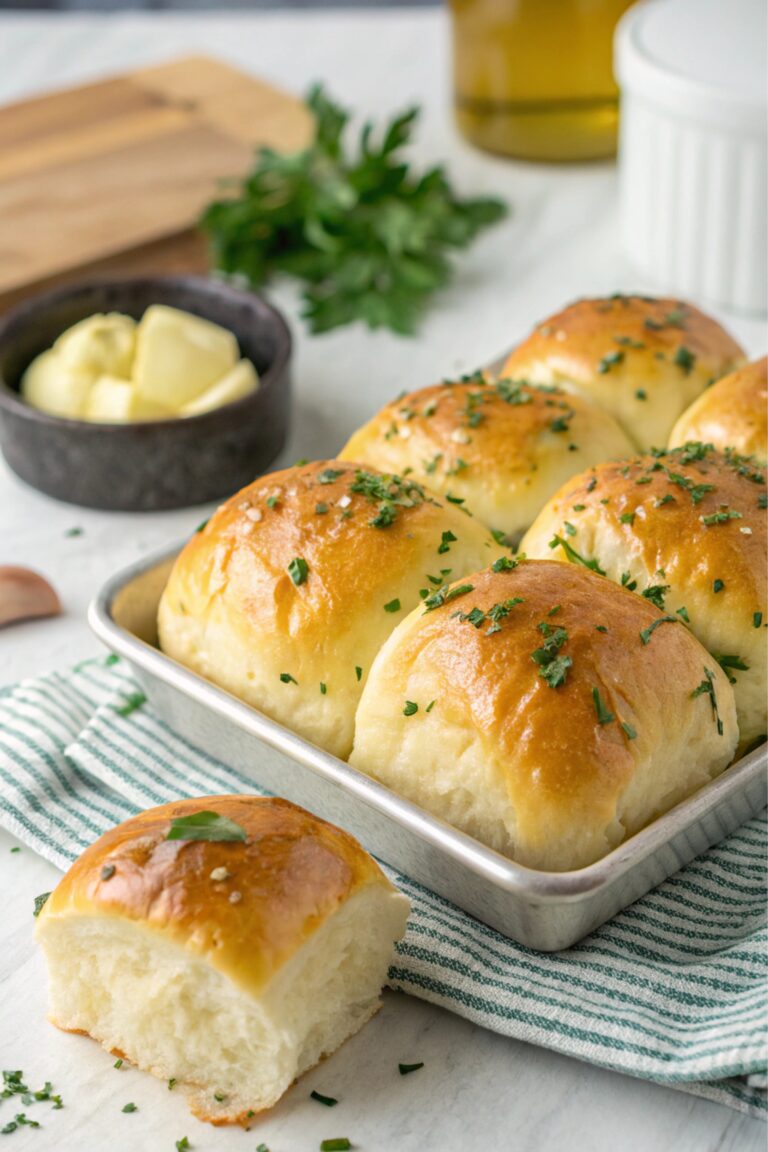
Garlic Butter Bread Rolls: 5 Steps to Easy Homemade Perfection
These soft and fluffy garlic butter bread rolls are rich, buttery, and packed with fresh garlic flavor. Perfect for family dinners, holiday gatherings, or as a savory snack, these bakery-style rolls are easy to make and sure to impress!
- Total Time: 1 hour 50 minutes
- Yield: 12-16 rolls 1x
Ingredients
- 4 tablespoons unsalted butter
- 2 garlic cloves, minced
- 2 tablespoons fresh parsley, chopped
- 1 teaspoon dried Italian seasoning
- Salt and black pepper, to taste
- 3 ½ cups all-purpose flour
- 2 ¼ teaspoons instant yeast
- 2 tablespoons granulated sugar
- 1 teaspoon salt
- 1 cup whole milk, warmed
- 1 large egg
Instructions
- In a small saucepan, melt butter over medium heat. Add minced garlic and sauté for 2 minutes. Remove from heat and stir in parsley, Italian seasoning, salt, and pepper.
- In a large bowl, mix flour, sugar, salt, and yeast.
- Add warm milk, egg, and half the garlic butter. Mix until combined.
- Knead dough for 8-10 minutes by hand or 5-7 minutes in a stand mixer until smooth.
- Place dough in a greased bowl, cover, and let rise in a warm place for 1-1.5 hours or until doubled.
- Punch down dough, divide into 12-16 pieces, and shape into balls. Arrange in a greased baking pan.
- Cover and let rise again for 30-45 minutes.
- Preheat oven to 400°F (200°C). Brush rolls with egg wash.
- Bake for 20 minutes or until golden brown. Brush with remaining garlic butter.
- Serve warm and enjoy!
Notes
- Use a kitchen scale for accurate flour measurement.
- Rolls can be made ahead and refrigerated overnight before baking.
- Freeze baked rolls for up to 3 months.
- Prep Time: 1 hour 30 minutes
- Cook Time: 20 minutes
- Category: Bread, Side Dish
- Method: Baking
- Cuisine: American
- Diet: Vegetarian
Nutrition
- Serving Size: 1 roll
- Calories: 180
- Sugar: 2g
- Sodium: 180mg
- Fat: 8g
- Saturated Fat: 5g
- Unsaturated Fat: 3g
- Trans Fat: 0g
- Carbohydrates: 22g
- Fiber: 1g
- Protein: 4g
- Cholesterol: 35mg